
Views: 126 Author: Site Editor Publish Time: 2025-12-31 Origin: Site


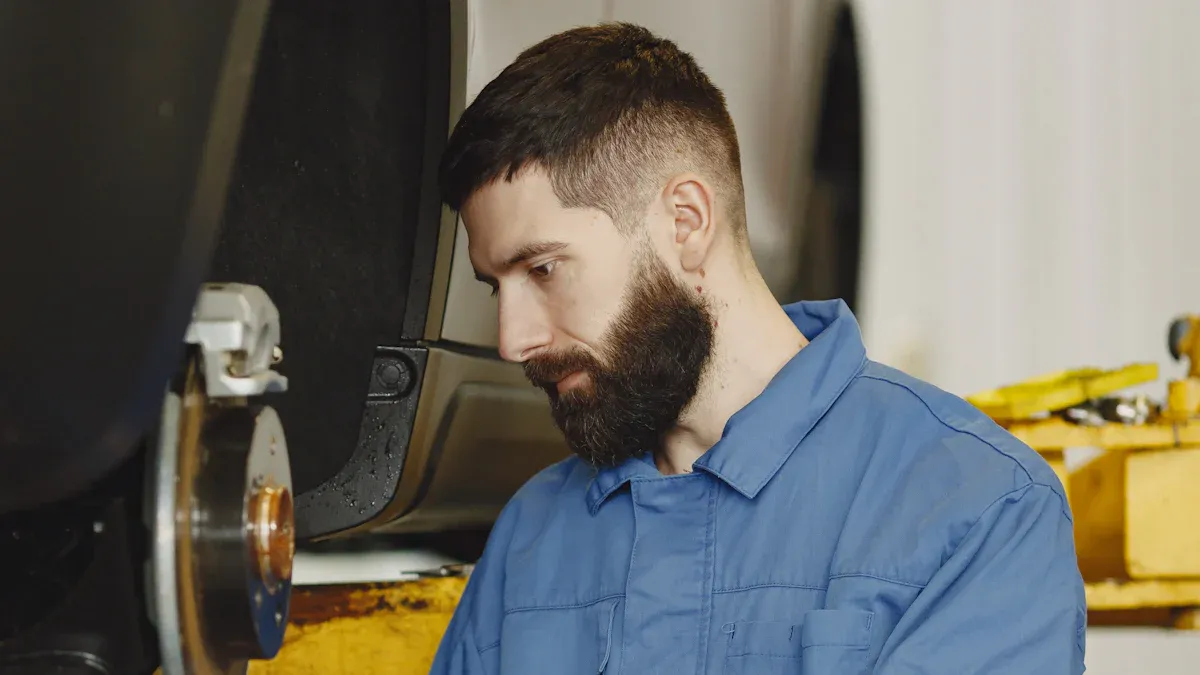
Changing your own brake pads might sound tough, but you can do it with some basic tools and a little care. When you follow each step closely, you help keep yourself and your car safe. Using top-notch friction materials from trusted brands like Talfri Brakes gives you even better results. Before you get started, make sure to read through every step so you feel confident and ready.
Get the tools you need like a jack, torque wrench, and gloves. This helps you work faster and keeps you safe.
Pick good, certified brake pads for better results and longer use. Good pads help your car stop smoothly and make less noise.
Always use jack stands and wheel chocks to hold your car in place. This keeps you safe while you fix the brakes.
Follow each step to take out old pads and put in new ones. Go slowly to make sure you do everything right.
Test the brakes after you finish to make sure they work well. A short test drive helps you find problems before you drive far.
You need some tools to change brake pads. Get these ready before you begin:
Jack stands keep your car steady.
Brake pad spreader or C clamp pushes caliper pistons back.
Torque wrench tightens bolts just right.
Allen or Torx set helps remove caliper bolts.
Brake line wrench loosens brake lines if needed.
Gloves protect your hands.
Having these tools close by helps you work faster. It also keeps you safe.
Safety is very important when you change brake pads. Wear these things:
Safety glasses protect your eyes from dust and dirt.
Gloves help you grip and keep your hands safe.
Closed-toe shoes protect your feet.
A dust mask is good to have if you see lots of brake dust.
Picking good brake pads helps your car stop better. It also makes the pads last longer. High-quality brake pads, like Talfri Brakes, use strong materials. These help your car stop smoothly and quietly. Certified pads fit your car well. They go through tough tests for safety and reliability.
Here’s why you should pick certified, high-quality brake pads:
Good materials make pads last longer and work better.
Pads made for your car fit best and stop well.
Quality checks mean better brakes and less noise.
You get smoother stops and pads that last longer.
Certified pads keep noise low for a nicer ride.
When you buy brake pads, look for certifications. These show the pads meet safety and quality rules. Here’s a quick guide:
Certification Type | Description |
|---|---|
Industry Standards | Makes sure brake pads follow safety rules from experts and regulators |
IATF 16949 | Tracks quality and helps companies make better products |
D3EA | Tests brake pads for top performance |
BEEP | Checks how well brake pads work in tough conditions |
Brake pads with these certifications give you safer and better brakes every time you drive.
You want to make sure your car stays put while you work. Park on a flat surface. This helps keep your car steady. Grab some wheel chocks and place them behind the tires that stay on the ground. Wheel chocks stop your car from rolling. Put your car in park and set the parking brake. These steps keep you safe and make the job easier.
Tip: Always double-check that your car is secure before you start removing any parts.
Next, you need to lift your car so you can reach the brake pads. Use a strong jack to raise the car. Find the right lifting points in your owner’s manual. Place jack stands under the car for extra support. Never trust just the jack to hold your car. Jack stands keep the car steady and safe while you work. Lower the car gently onto the stands. Give the car a little shake to make sure it sits firmly.
Use a jack to lift the car.
Place jack stands under the frame.
Lower the car onto the stands.
Check stability before you start.
Safety gear helps protect you from dirt and injury. Put on gloves, safety glasses, and closed-toe shoes. These keep your hands, eyes, and feet safe. If you see lots of brake dust, wear a dust mask.
Before you compress the caliper pistons to fit the new brake pads, open the master cylinder cap. This step matters because pushing the piston back sends brake fluid into the reservoir. Opening the cap lets the fluid move freely and stops pressure from building up. You avoid overflow and keep your brake system working right.
Note: Always check the brake fluid level after you finish installing the brake pads.
Taking these steps helps you stay safe and makes changing brake pads much smoother.
Ready to get your hands dirty? Here are the step-by-step instructions you need to change brake pads safely and efficiently. Grab your tools, take your time, and follow each step closely. If you ever feel unsure, check your vehicle’s factory manual for specific details.
You need to take off the wheel to reach the brake pads. Here’s how you do it:
Loosen the lug nuts on the wheel while your car is still on the ground. Don’t remove them yet.
Jack up your car until the tire lifts off the ground.
Slide a jack stand under the frame for support.
Finish loosening and remove the lug nuts with your fingers. Keep them in a safe spot.
Pull the tire off and set it aside. Some people like to place the tire under the car next to the jack for extra safety.
Tip: Always keep the lug nuts together so you don’t lose any.
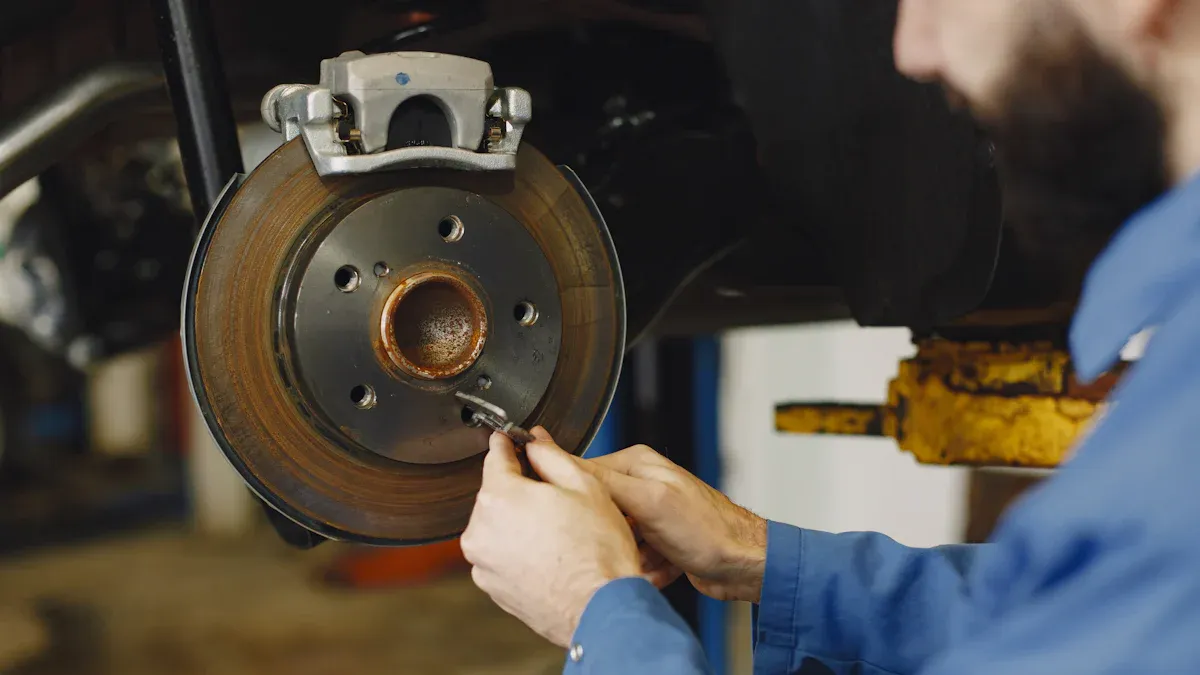
Now you can see the brake assembly. You need to unbolt the caliper to access the brake pads.
Find the caliper bolts. Use the right wrench or socket for your car.
Remove the bolts. Most calipers have two bolts holding them in place.
Check your factory manual for the correct torque specs when you put the bolts back. Here’s a quick guide:
Position | Bolt Type | Torque Specification |
|---|---|---|
Front | M12x1.5 | 202 Nm (149 ft-lb) |
Rear | M12x1.5 | 150 Nm (110 ft-lb) |
Pivot the caliper up or to the side. Don’t let it hang by the brake line. Use a piece of wire or a bungee cord to support it.
You’re almost there. Take out the old brake pads.
Slide the pads out of the caliper bracket. Sometimes you need to wiggle them a bit.
Look for signs of wear. Squealing or screeching sounds, grinding noises, vibrations, longer stopping distances, or a brake warning light mean your pads are worn out.
If you see uneven wear or damage, check the caliper and hardware for problems.
Note: Brake wear indicators make a squeaking sound when pads are thin. Listen for this warning.
Clean caliper pins help your new brake pads move smoothly. Don’t skip this step.
Use a brush to clean the bore of the caliper.
Pick a recommended cleaning agent. Here are some good choices:
Cleaning Agent | Description |
|---|---|
Brake Lube | Used for caliper slides, often comes with new pads. |
Silicone Grease | Recommended for coating caliper bushings. |
Lithium Soap Base Glycol Grease | Another option for caliper bushing lube. |
High Temperature Silicone Grease | Preferred grease for caliper pins. |
Synthetic Brake Grease | Can be used on slides and pads. |
Permatex Ultra Disc Brake Caliper Lube | Only for metal-to-metal surfaces. |
Lubricate the new boot with the grease you choose.
Make sure the boots sit properly at both ends.
Tip: Clean and lubricate caliper pins every time you change brake pads. This helps prevent sticking and uneven wear.
You need to push the caliper piston back so the new brake pads fit.
Put a towel around the open reservoir cap to catch any brake fluid.
Choose the right rewind tool or use a C clamp.
Attach the circular plate to your tool and fit it to the caliper.
Turn the handle to compress the piston. It gets easier after you start.
Watch for fluid movement in the reservoir. Don’t let it overflow.
Note: Compressing the piston makes room for thicker, new brake pads.
Time to put in the new brake pads. Make sure they sit snugly in the caliper bracket.
Slide the new pads into place. Check that they match the old ones in shape and size.
If your pads have wear indicators, face them the same way as before.
Double-check that the pads sit flat and don’t wobble.
After you finish, you need to bed the new pads. This helps them work better and last longer. Here’s a simple bedding procedure:
Drive at 40 mph and make 5 moderate to aggressive stops down to 10 mph. Don’t let the brakes cool between stops.
Next, do 5 moderate stops from 35 mph to 5 mph, again without cooling.
Drive for about 5 minutes at a moderate speed to let the brakes cool.
Tip: Bedding the pads helps them seat properly and prevents brake judder.
You’re almost done. Put everything back together.
Pivot the caliper back over the new brake pads.
Reinstall the caliper bolts. Tighten them to the correct torque spec from the table above.
Put the wheel back on. Hand-tighten the lug nuts first.
Lower the car off the jack stands.
Tighten the lug nuts in a star pattern to make sure the wheel sits evenly.
Note: Always check your work before you drive. Make sure every bolt is tight and every part is in place.
You did it! You followed the step-by-step instructions to change brake pads. Your car is safer, and you saved money by doing it yourself.
You finished installing your new brake pads, but don’t rush to drive yet. Take a few minutes to check your work. Here’s a simple checklist to follow:
Gather your tools. You’ll need a jack, jack stands, lug wrench, flashlight, and a ruler or measuring tape.
Make sure your car sits on a level surface. Block the wheels and set the parking brake.
Remove the wheels again if you want a closer look.
Use your ruler to check the thickness of the brake pads. Look for wear indicator tabs. Pads should look even and not too thin.
Repeat these steps for each wheel. Sometimes the front and rear brake pads wear differently.
If you spot anything odd, like uneven wear or missing clips, fix it before you move on.
Before you hit the road, test your brakes in a safe spot. Here’s a quick table to guide you:
Step | Description |
|---|---|
1 | Remove wheels for a final inspection if needed. |
2 | Check all ends of the brake pads for thickness and uneven wear. |
3 | Look for cracked flex lines or leaking calipers. |
4 | Examine the rotor surface for grooves or damage. |
5 | Replace pad wear indicators or other parts if needed. |
Testing helps you catch problems early. If everything looks good, you’re ready for a test drive.
Start your test drive in a quiet area. Press the brake pedal a few times before moving. Make sure it feels firm and steady. Listen for any strange sounds:
Clicking noises during braking can mean loose brake pads or old anti-rattle clips.
Knocking or squealing might point to problems with caliper bolts or reused clips.
If you hear anything odd, stop and check your work. Good brake pads should give you smooth, quiet stops.
High-quality friction materials, like those from Talfri Brakes, make a big difference. You get better heat resistance and wear resistance. These materials help your brake pads last longer and stop your car faster. New technology means you enjoy safer drives and fewer worries.
Tip: Always use certified, high-quality brake pads for the best results.
When you follow each step to change brake pads, your car stays safe. Your car also works well. Good brake pads from trusted brands help you avoid problems. These problems include noise, bad stopping, and extra repairs. You should check your brakes every 10,000 to 15,000 miles. You can also check them at least once a year. Taking care of your brakes gives you many benefits:
Benefit | Why It Matters |
|---|---|
Improved Safety | Lowers your chance of accidents in hard weather |
Cost-Effectiveness | Stops big repairs and saves you money |
Enhanced Performance | Lets you stop fast and smooth |
Prolonged Lifespan | Pads and rotors last longer |
Better Fuel Efficiency | Your car uses less gas |
Do you have questions or want to share your story? Leave a comment below!
You should check your brake pads every 10,000 to 15,000 miles. Replace them if they look thin or you hear squealing. Regular checks help you stay safe.
You can change brake pads with basic tools like a jack, wrenches, and a C clamp. Some cars need special tools, so check your manual first.
Look for squealing, grinding, or longer stopping distances. If your brake warning light comes on, check your pads right away.
You usually don’t need to bleed the brakes if you only change pads. If you open the brake lines or see spongy brakes, bleeding may help.
Quality friction materials, like Talfri Brakes, give you smoother stops and longer pad life. They also make vehicle maintenance easier and safer.


